Selecting a Data Source
When creating a widget, it is necessary to select a Data Source for your widget from the drop down menu (see below) - this is where the information displayed in the widget will be extracted from. The 'Data Source' tab is displayed when the 'Display Settings' pop-up screen first opens. Each Data Source is described in the following sections of this Help Guide. Please note: further information about what is included for each data source is available in the Data Source matrix and in the Glossary of terms used in widgets.
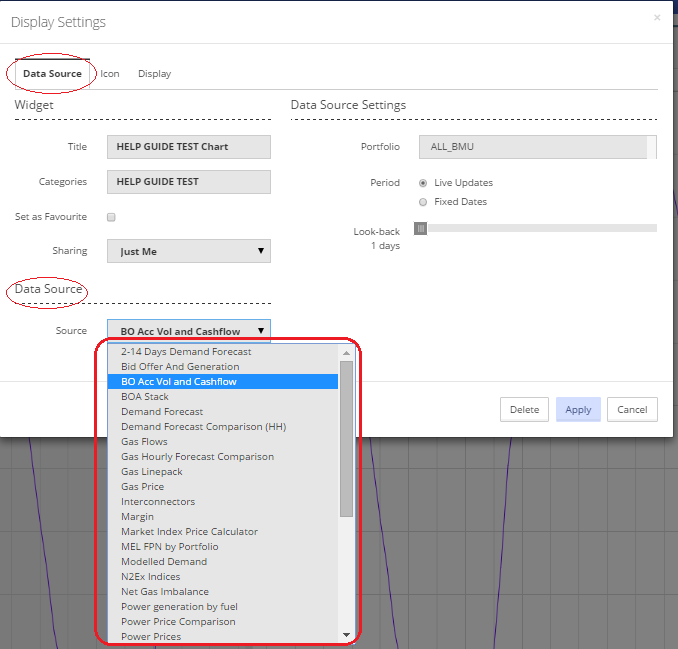
Having selected your data source from the drop down menu (see above), select the Data Source Settings on the right hand side of the screen as required. Then click on the 'Icon' and 'Display' tabs to complete the relevant selections.
Please note that once a data source has been selected the relevant Data Source Settings will be displayed on the right hand side of the pop-up screen (these user settings will vary depending on the data source selected). The choice of data source also affects the options that will be available in the 'Display' tab of the Display Settings pop-up screen.
Please note that the 'Data Source' drop down menu contains a number of data sources that will not be available for all types of widget, e.g. some data sources will be available for table widgets but will not be available for chart widgets.
As soon as the  button is clicked on it will create a widget and close the pop-up screen, leaving the user looking at the widget. Therefore it is not necessary to click on the
  button until all tabs on the 'Display Settings' pop-up screen have been completed. If it is clicked on before the tabs have all been completed, click on the edit symbol
  at the top right of the screen when looking at the widget to return to the 'Display Settings' pop-up screen and complete the remaining tabs.
Created with the Personal Edition of HelpNDoc: Produce Kindle eBooks easily